Release of Information
Table of Contents
Find An Existing ROI
To see if a specific ROI exists for a client:
- Select your client
- Select Release of Information from the client menu.

Once in the release tab, you will then choose the Status that you are looking for by default you will see all of the active releases for the client. Generally, you will only want to see Active releases. You also have the option to see Inactive (unsigned), Expired, Revoked, Invalid, Waiting For Client Signature, and Waiting for Staff Approval releases.

After choosing this option (or leaving it at Active for viewing current releases) you will then be brought to all of the releases for that Status. You can then use the drop downs to search for the release that you are looking for. You can also sort the releases by clicking the headers. You can sort by signed date, primary contact, and expiration date.

Once you have found the release that you are looking for, you will see that there are various options available on the right-hand side buttons. If you want to see the release that was signed (this is recommended), choose View Scanned. The ROI that has been scanned in will pop up in a separate window. You can also choose PDF, which will pop up a representation of data that was entered for that release in Neo.

Create A New Release
First, check to see if a specific release exists for a client (either active or inactive). This is important; otherwise, you may end up creating a duplicate entry. Then, on the left-hand side, choose the option that you need to make the release that best suits your needs. You can choose “Add” to add a new release or “Blank PDF” to print off a blank release with the client information prefilled.
- Add will give you the ability to enter specific organization contact info into the release form, prior to printing and obtaining the client's signature.
- Blank PDF will only give you a release form with the client identifying info pre-filled. Everything else will have to be handwritten on the form.

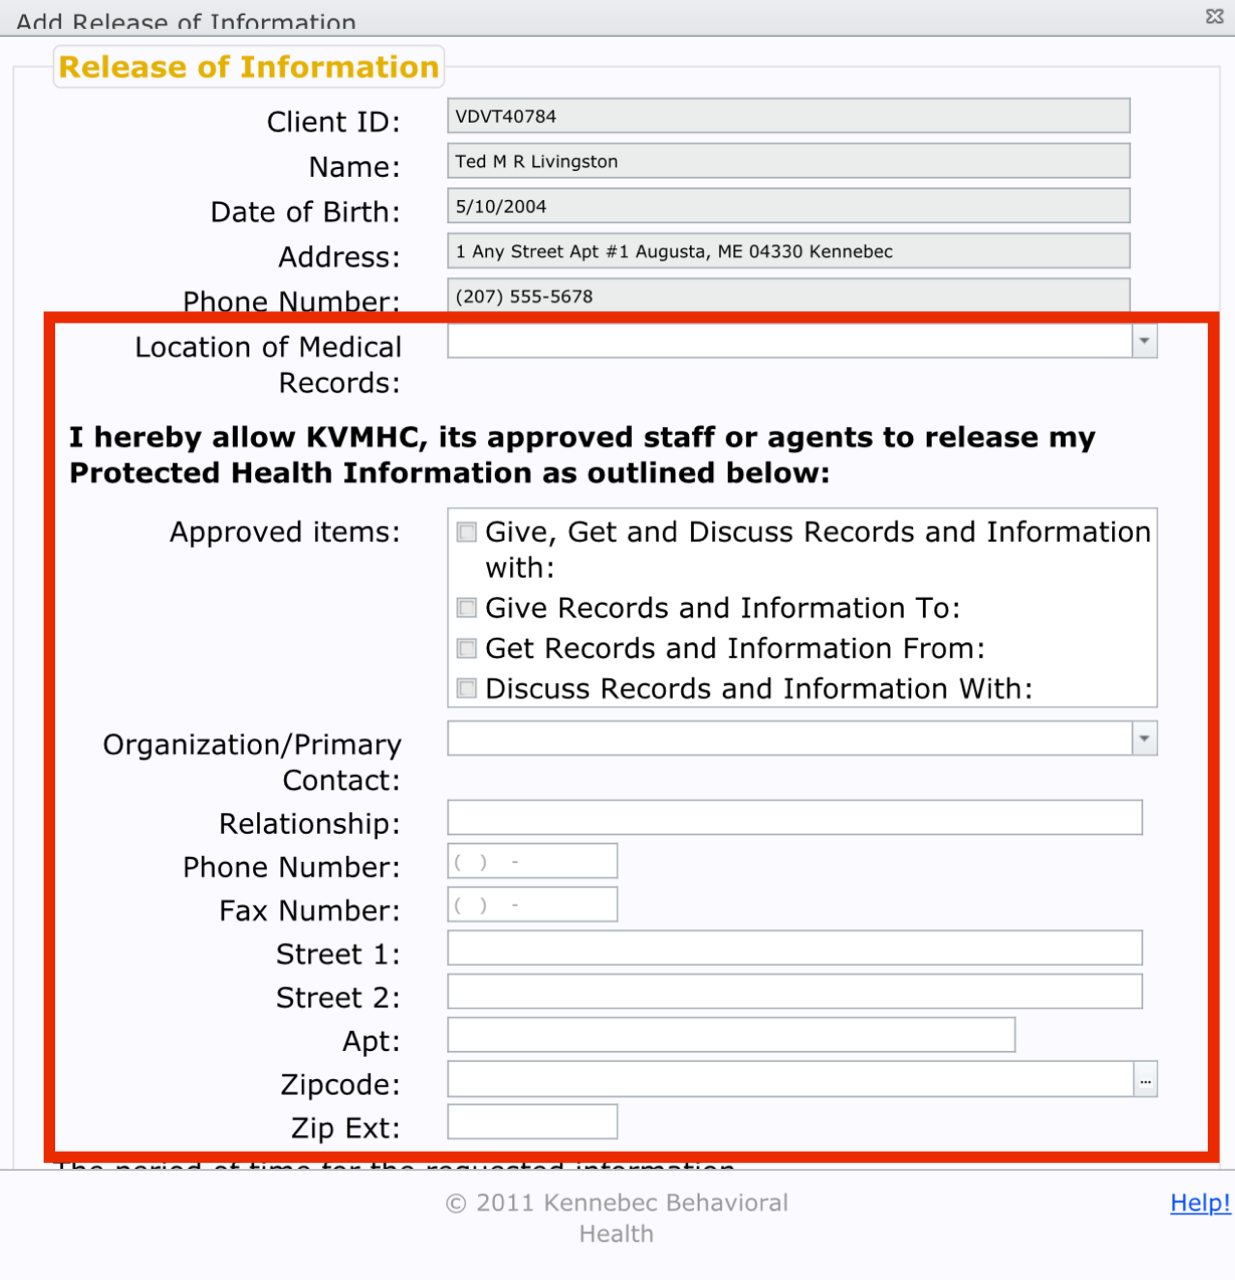
If you choose the Add ROI button, you will be brought to the screen to enter the release. You will enter the information on this screen, starting with the location of the release. You will then choose the Give, Get and/or Discuss options. Then you will enter the organization information.
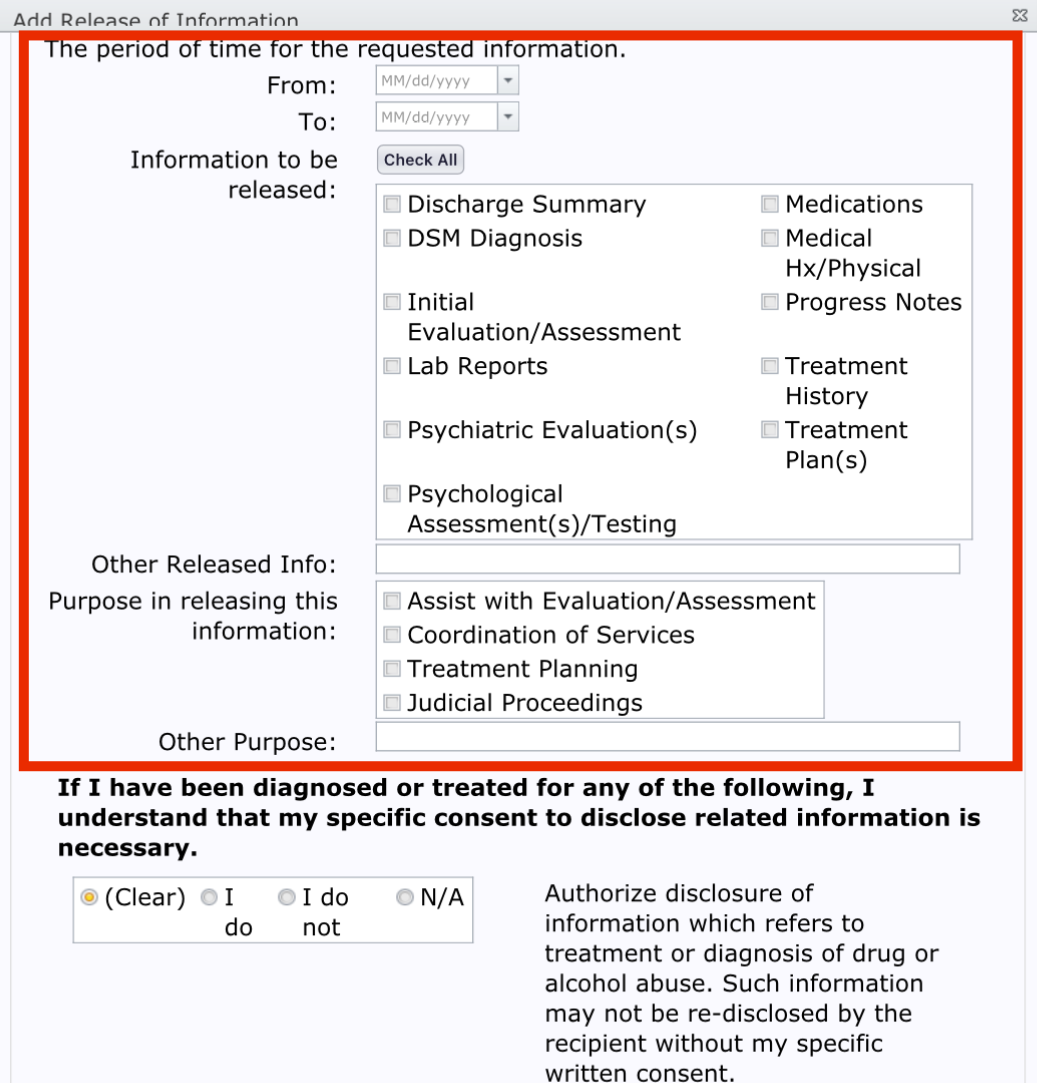
After entering this information, you then move to the next section of the release. The From and to dates will be entered, and then the Information to be Released, and the Purpose in Releasing Information.
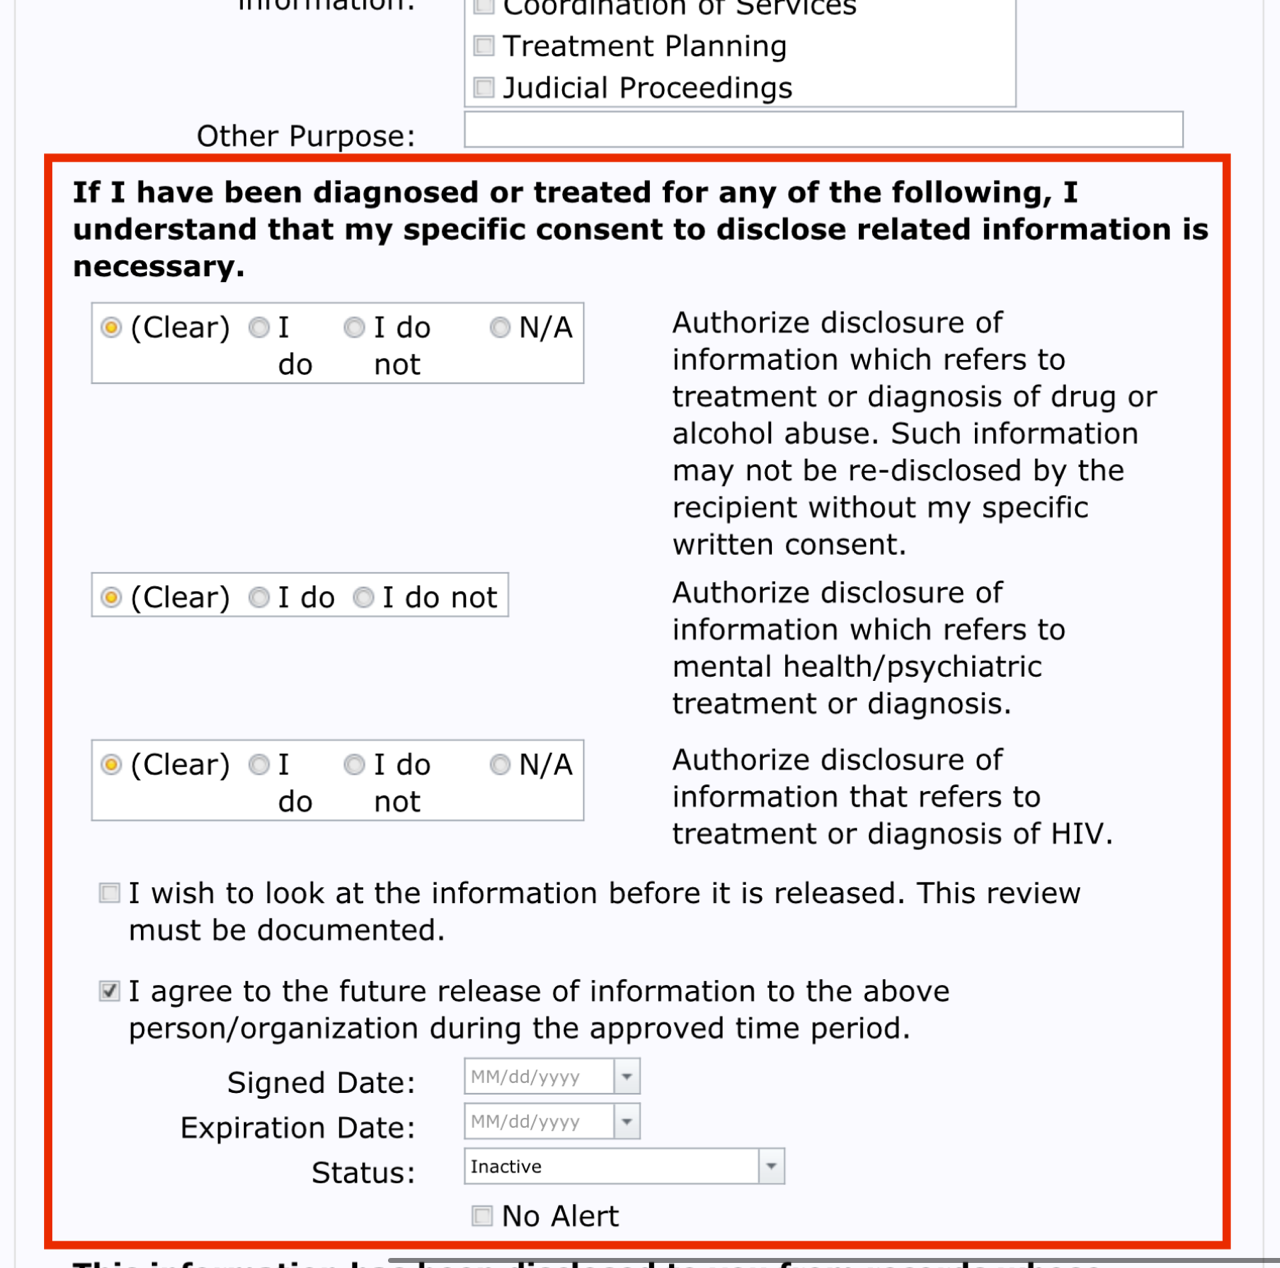
You will then move to the third part of the release. This is where you will enter the Do, Do Not, or N/A options, whether or not the client wishes to review and the expiration dates. The signature date should be left blank until the client actually signed the release. Medical Records staff are the only staff who are authorized to enter a date under Signed Date and they will do this when the release is turned into a Medical Records office for verifying, scanning, and entry of the date.
If you do not care about receiving an alert when the release expires (one-time only release to an attorney, for example) choose the no alert button and you will not be bothered with an alert when this release hits its expiration date.
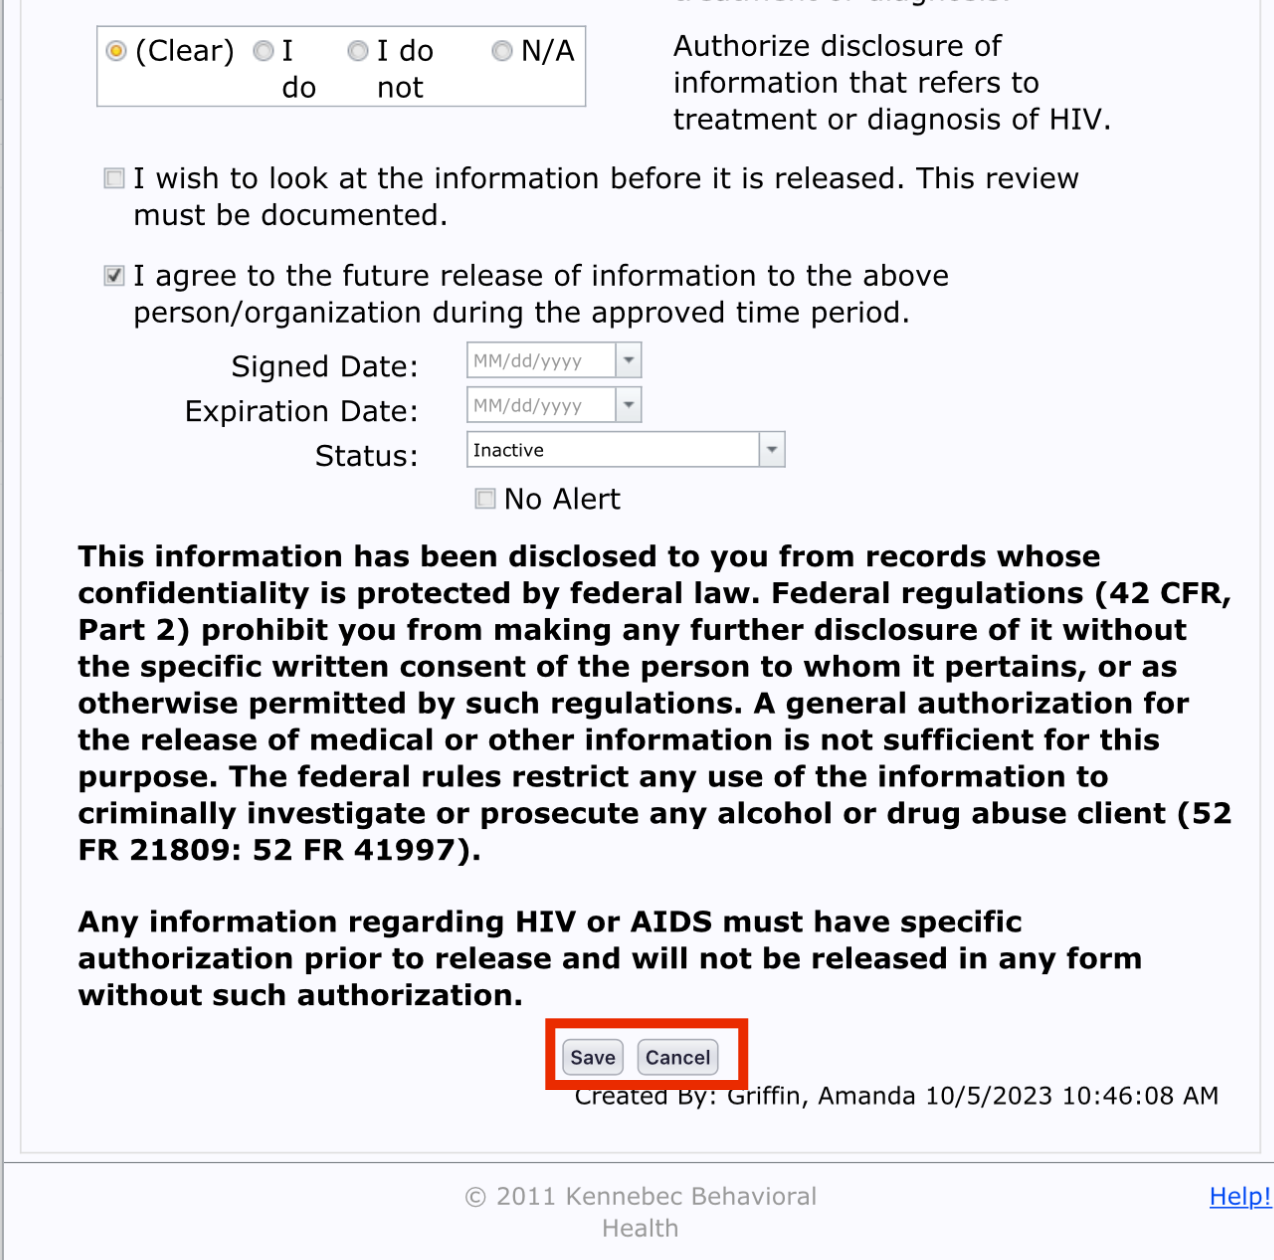
Once this information is completed, you will then choose Save and the release will now be entered into NEO.
You can also choose Cancel if you have made an error or you no longer want to make the release. This will cancel the work you have done and WILL NOT save your work.
Once a release has been staged, you will need to locate it under “inactive” releases. This is where all of the releases that have not yet been signed (with a signature date entered, thus verified, by a Medical Records staff person).
You can choose the S button to edit an inactive (unsigned) release.

Renew A Release
Staging a renewal for an already existing expired or expiring release:
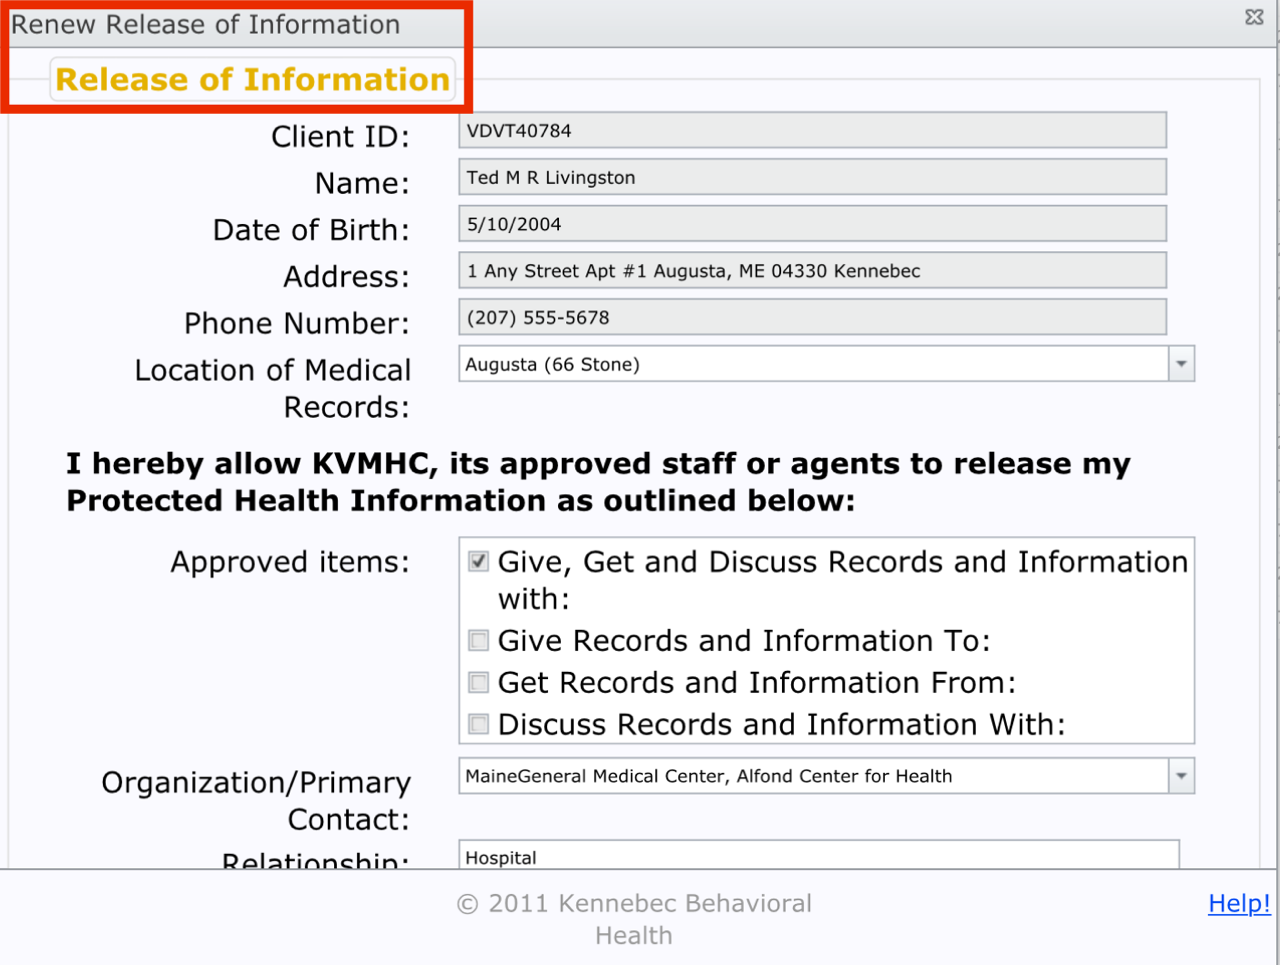
Choosing the Renew ROI option will generate a brand-new ROI to be signed by the client based on the parameters of the expired/expiring ROI. You will be asked, Are you sure you want to renew this release?, choose OK and you will be brought to the screen below. At this point, you can review and update information in any of the fields, as per client needs, and then choose the save option. The “To” and “Expiration” dates will be automatically updated to one year from the date the renewal was generated.
If you are entering the renewal process from your alerts, you will end up getting into the ROI page on the client menu and can access the release from there.
