Using the Document Scanner
Scan documents and send directly to medical records
Table of Contents
How-To
The document scanner allows you to send documents directly to Medical Records by using the camera on your device.
Watch How It's Done🎥
Step One
Step Two 🎥
📷Step-By-Step
Select client

📷Select Upload

📷Photo Quality
Here's an alert just reminding you to be mindful of the quality the photo that you take.
Tips:
-
Take the photo in a well-lit area.
-
Set document on a solid, dark-colored surface so that it stands out.
-
Make sure the lens of the camera on your device is clean so that your image is clear.
-
Hold your camera as steadily as possible to avoid a blurry image.

📷Choose File
Select Choose File to open up your device's camera.
Note: Clicking this button will yield different results, depending on the type of device you're using.
Mobile devices will bring up your camera when you click Choose File, allowing you to take a photo of the intended document in real-time and submit.
Laptops and desktop computers will bring up your computer's storage when you click Choose File, meaning you will only be able to upload images previously taken and saved.

Scanning From A Laptop or Desktop |
Scanning From An iPad Or Phone |
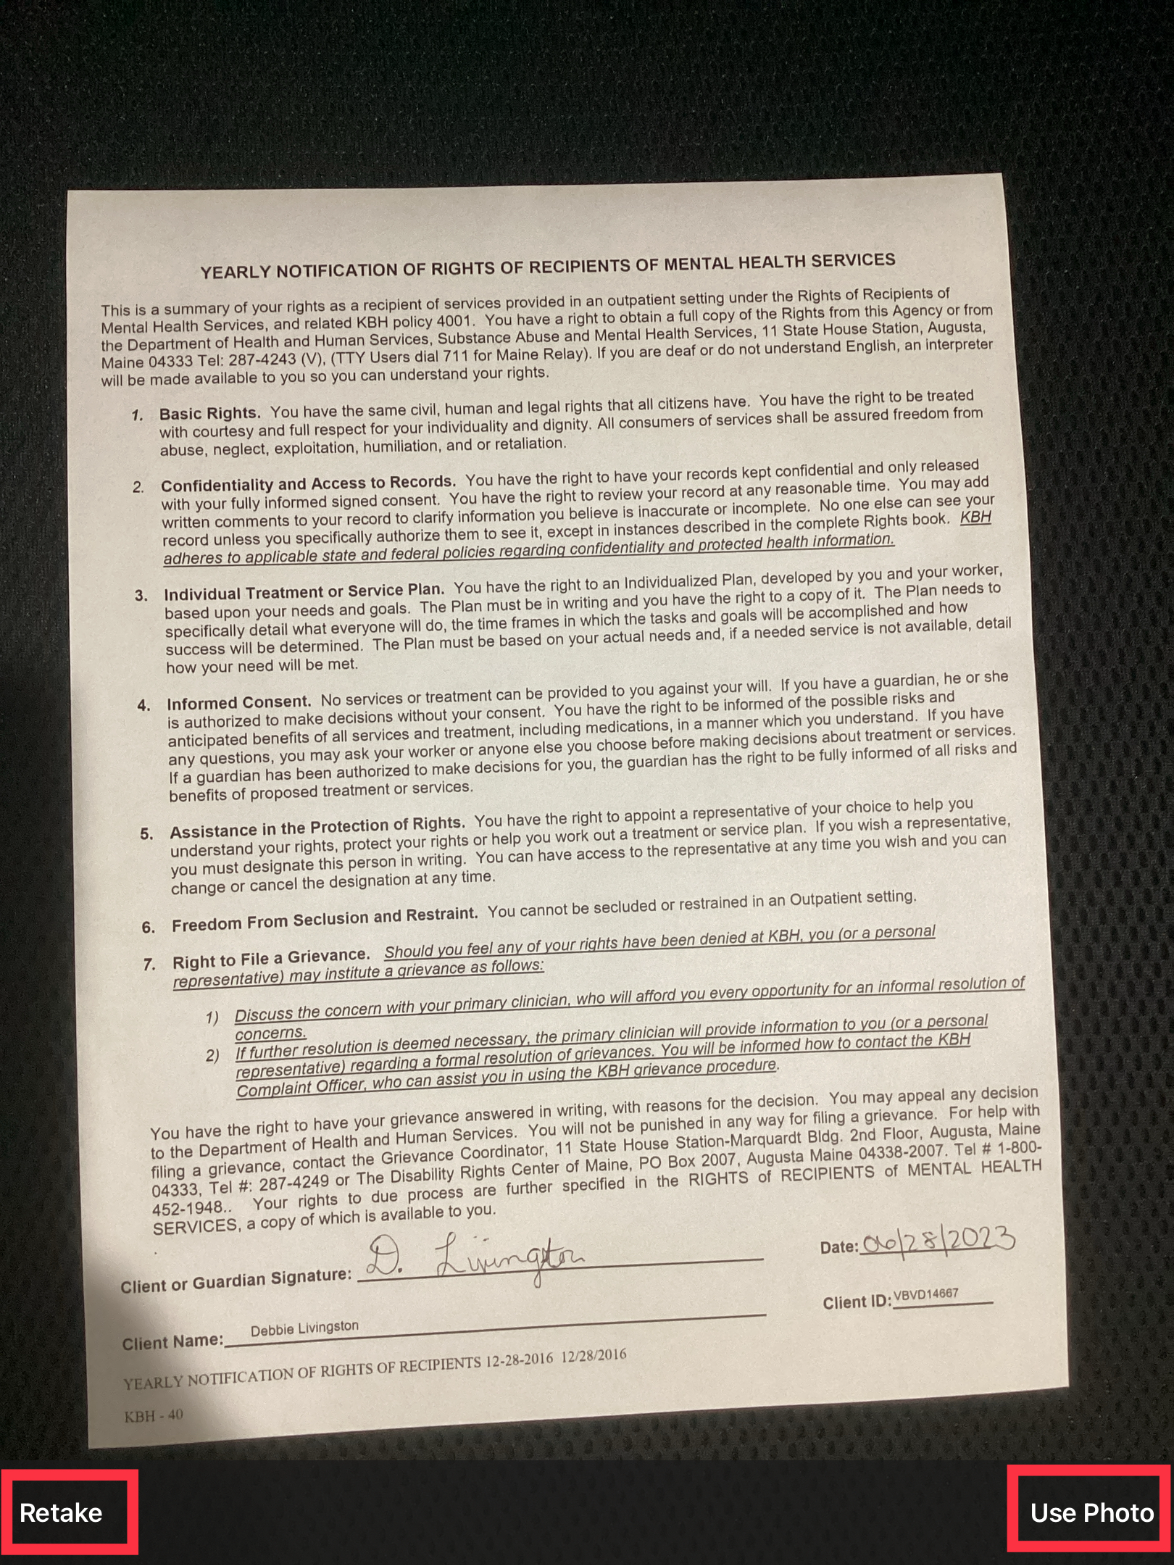
📷Take Photo
Take the image of your document. Use Tips listed above to assist you with getting the most legible photo.
If you aren't happy with your image, select Retake and try again. Once you're happy with your image, select Use Photo.

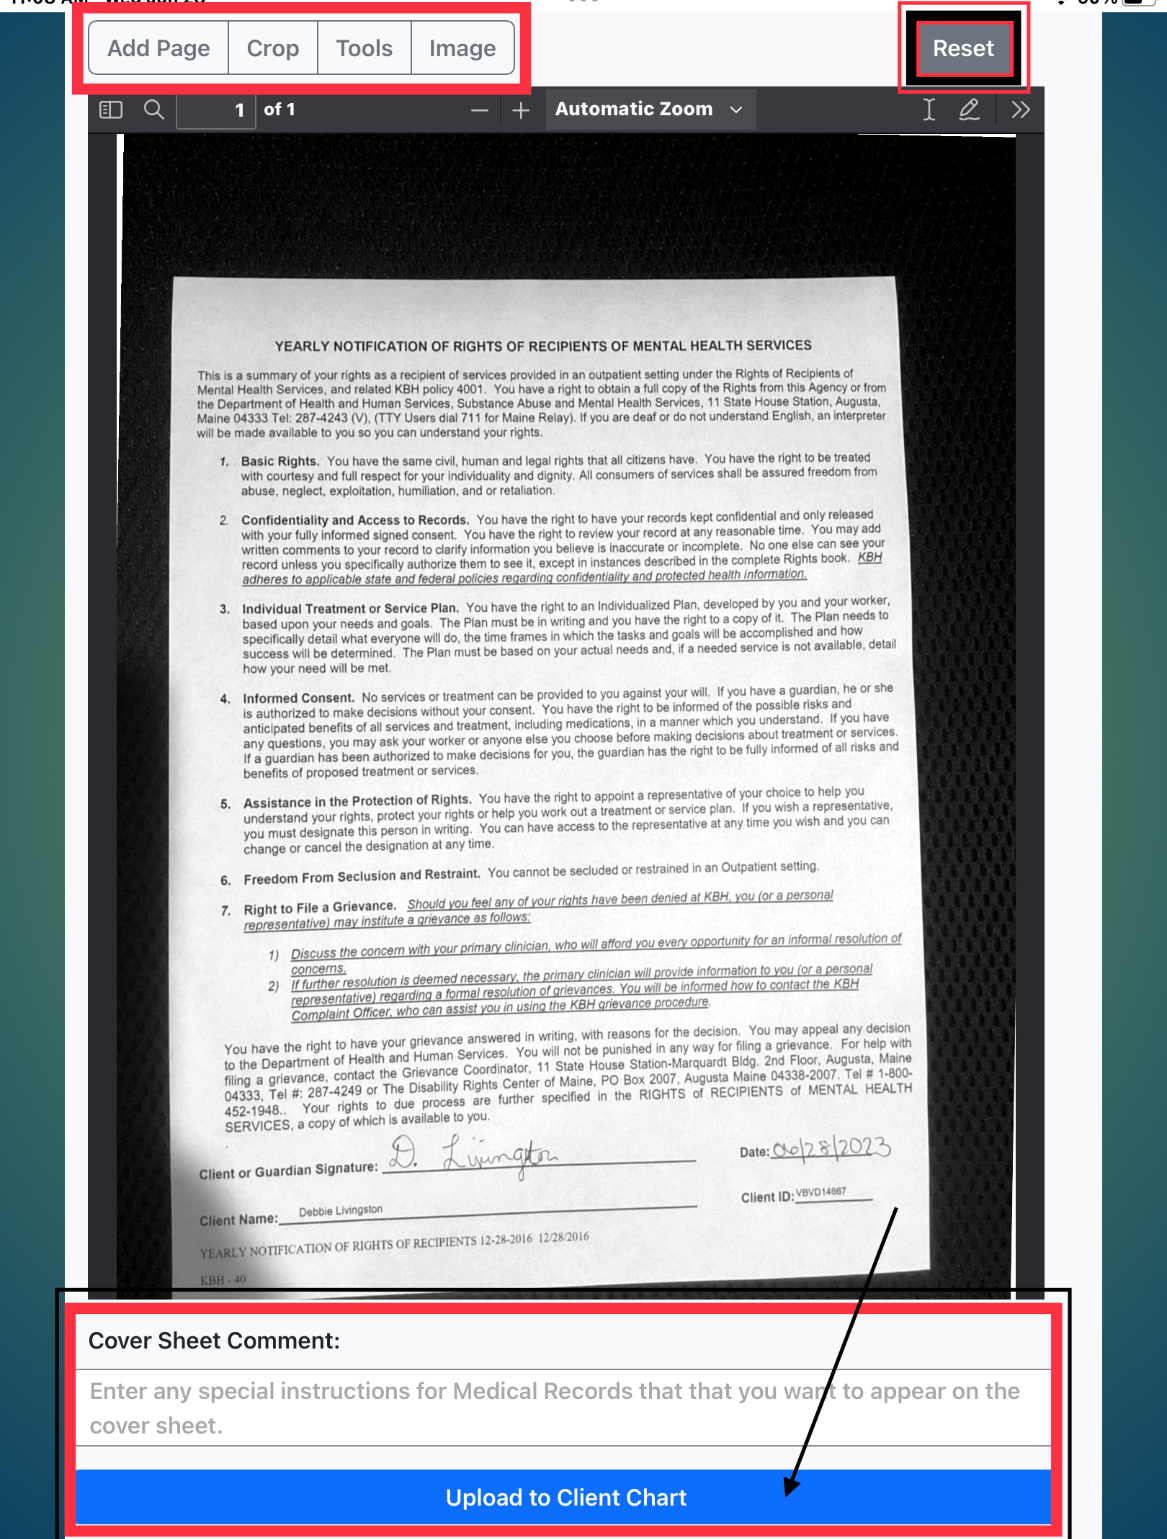
📷Adjust Image and Send to Medical Records
Select Add Page if your document includes multiple pages.
You can also select Crop, Tools, or Image to make edits to your image such as cropping, or adjusting its brightness.
Reset if you want to completely undo your adjustments.
In the comment box, enter any information that you would like to relay to medical records regarding your document. Note: Client ID, date and time stamp, and name of Staff will already be included on the cover sheet.

📷Complete
Once complete, your document will be listed under Documents and described as the Last Uploaded File.
You can view it, if needed and it has now been sent to Medical Records in the form of an electronic fax, for them to review and officially add it as a document in the client's chart.

