From The Schedule
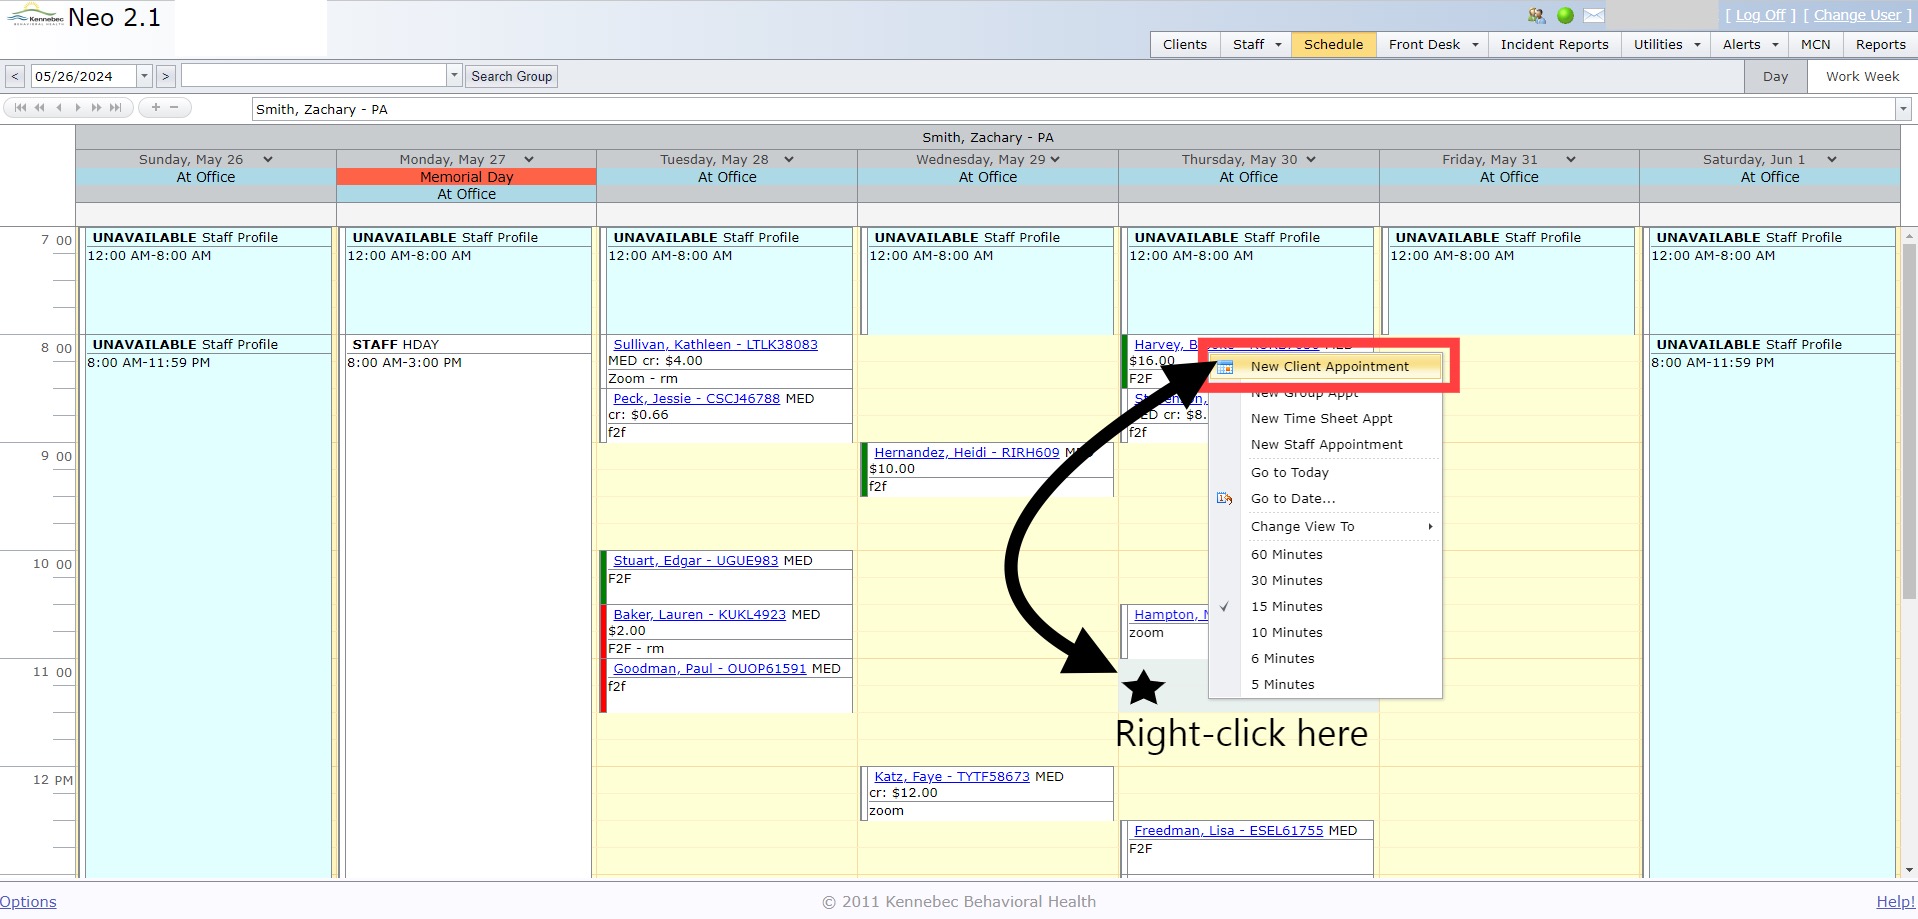
Create a new client appointment.
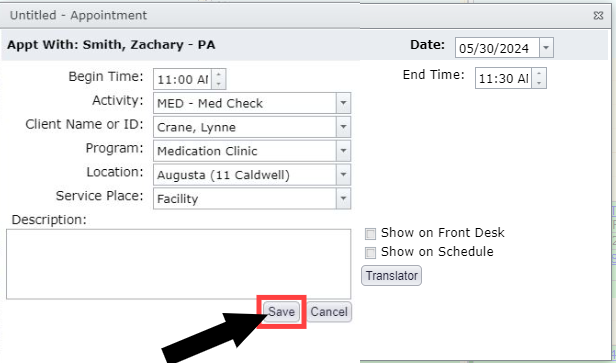
Complete each field and then click Save.
|
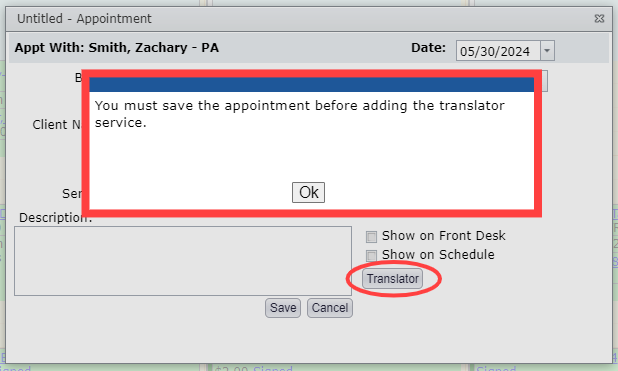
You must save the new appointment, before adding on the translator service.
If you click the Translator button prior to saving the appointment, an alert will pop up reminding you to do so. |
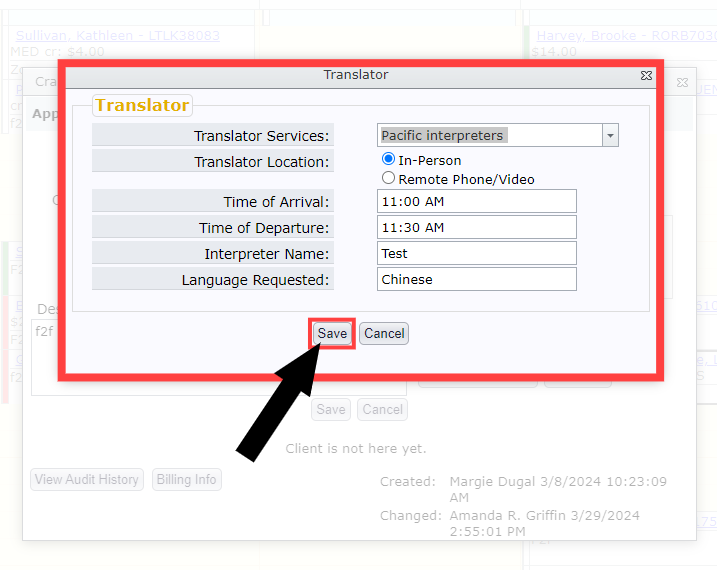
Once the appointment has been saved, re-open the appointment (right-click and select Open or double-click on the appointment).
Click Translator.

Complete each field and click Save.
| *Please Note: this information can be edited from the schedule at any point, and from the appointment note until it is signed. If you don't know what the interpreter's name is when scheduling, enter anything along the lines of Pending or TBD - basically as a placeholder until you have the information you need. |
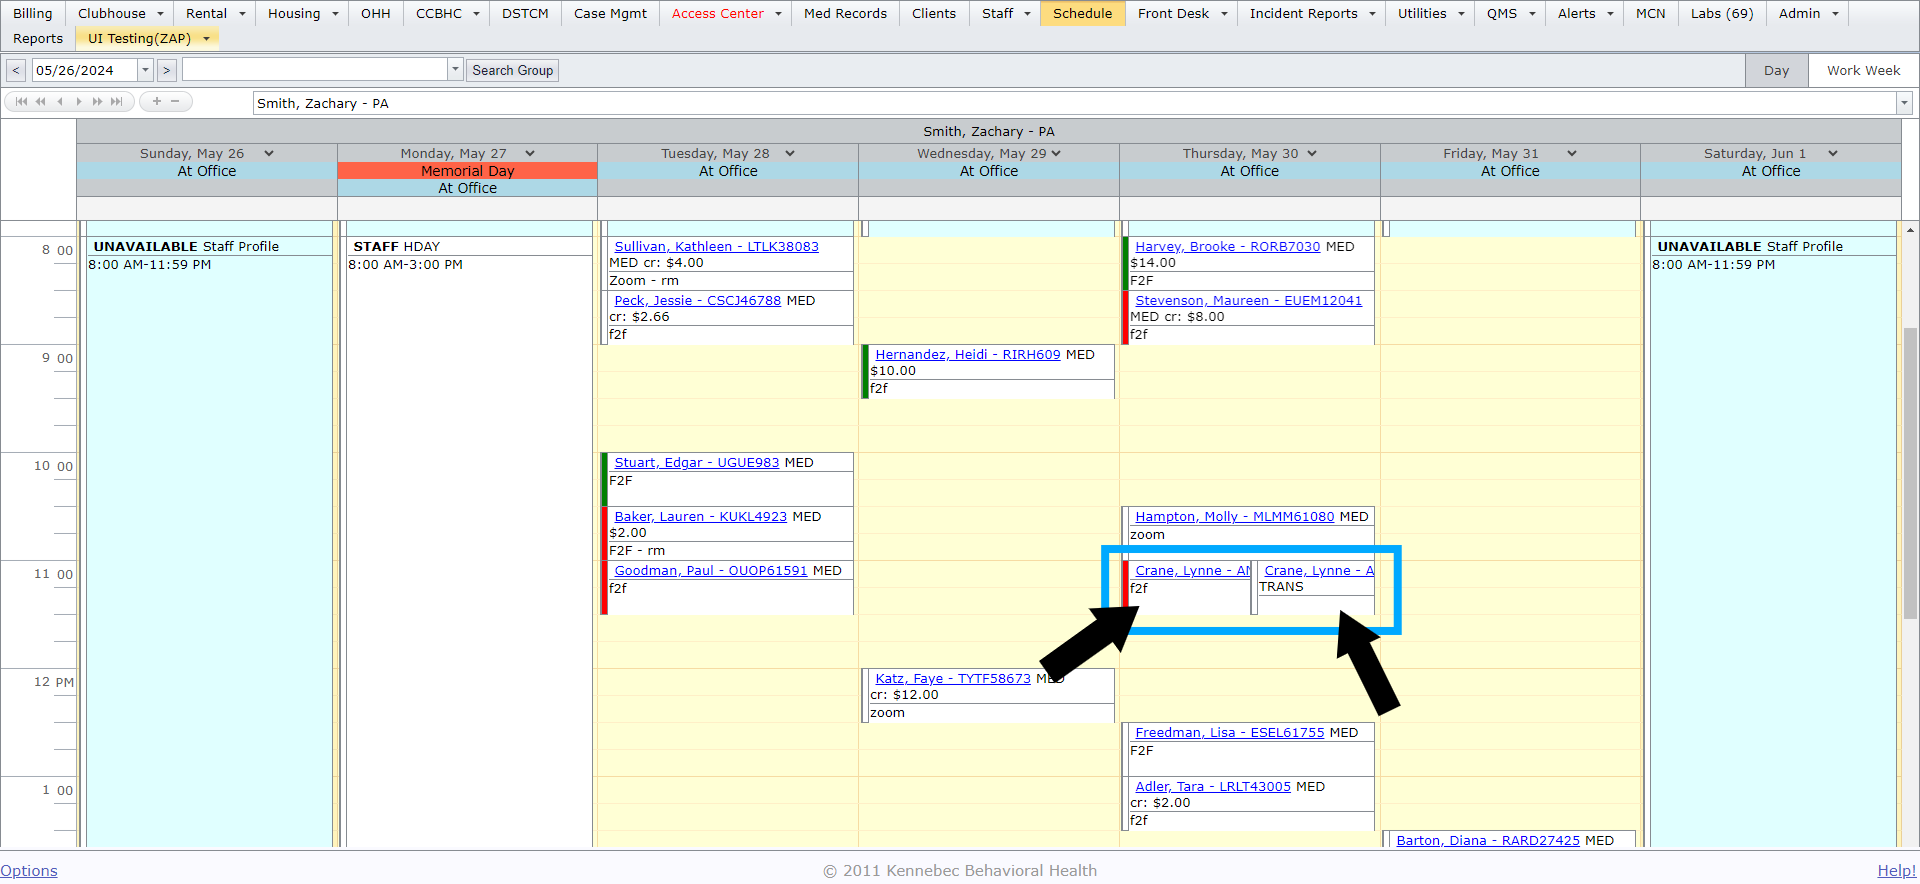
Here's how it will appear on the schedule.
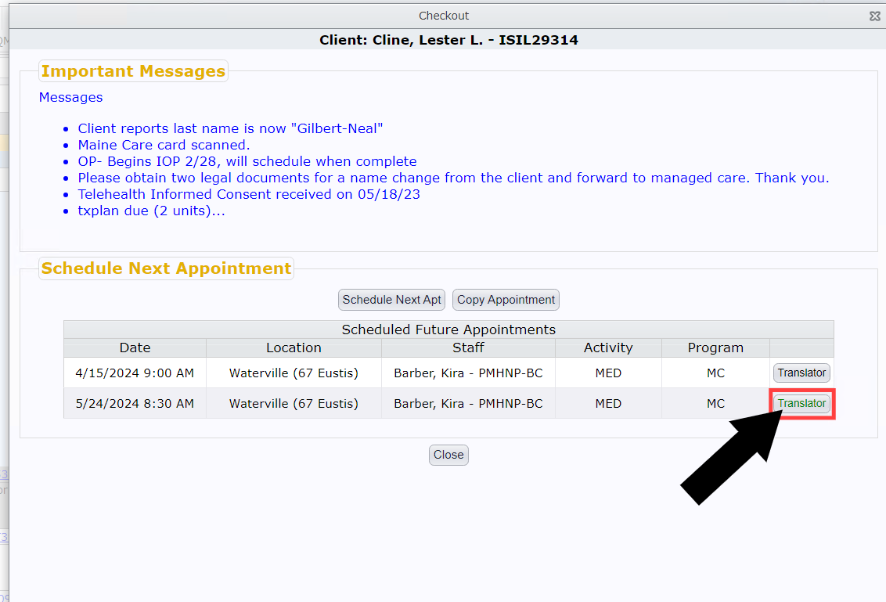
From Check Out
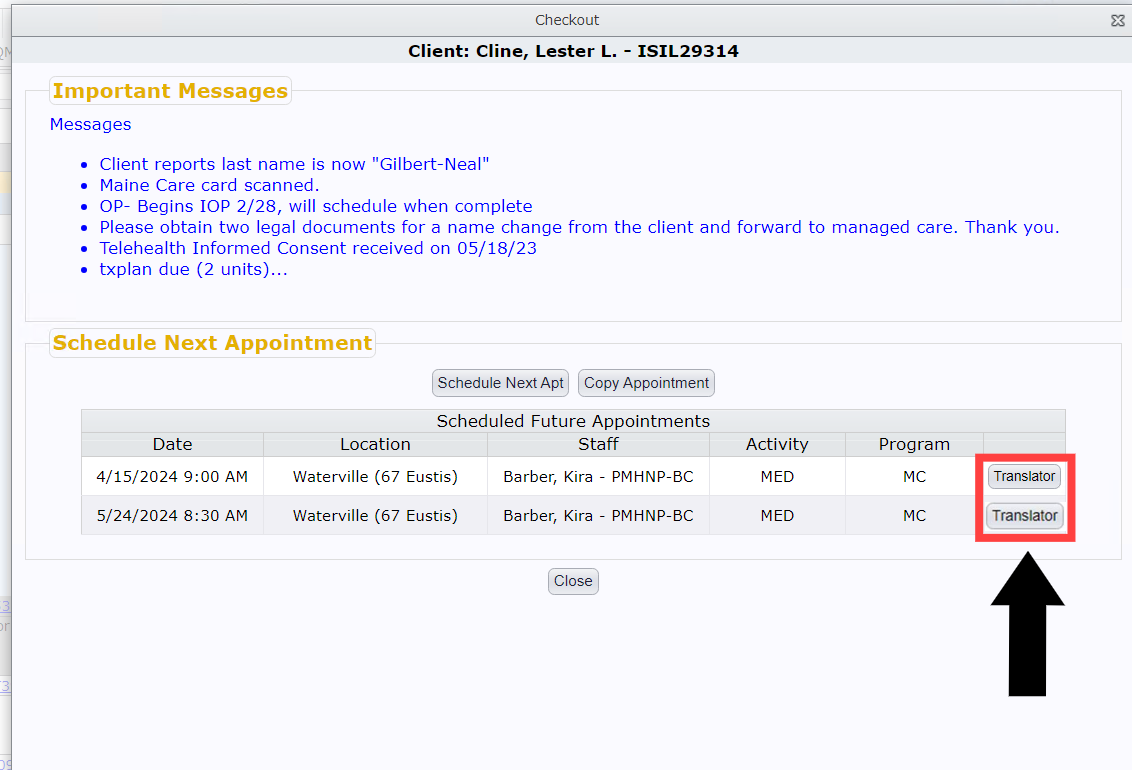
You will follow the typical checkout process to get client's next appointment, which will bring you back to the screen shown below.
You will see a Translator button in the far right column. Click the Translator button next to the appointment you need to schedule a translator for.
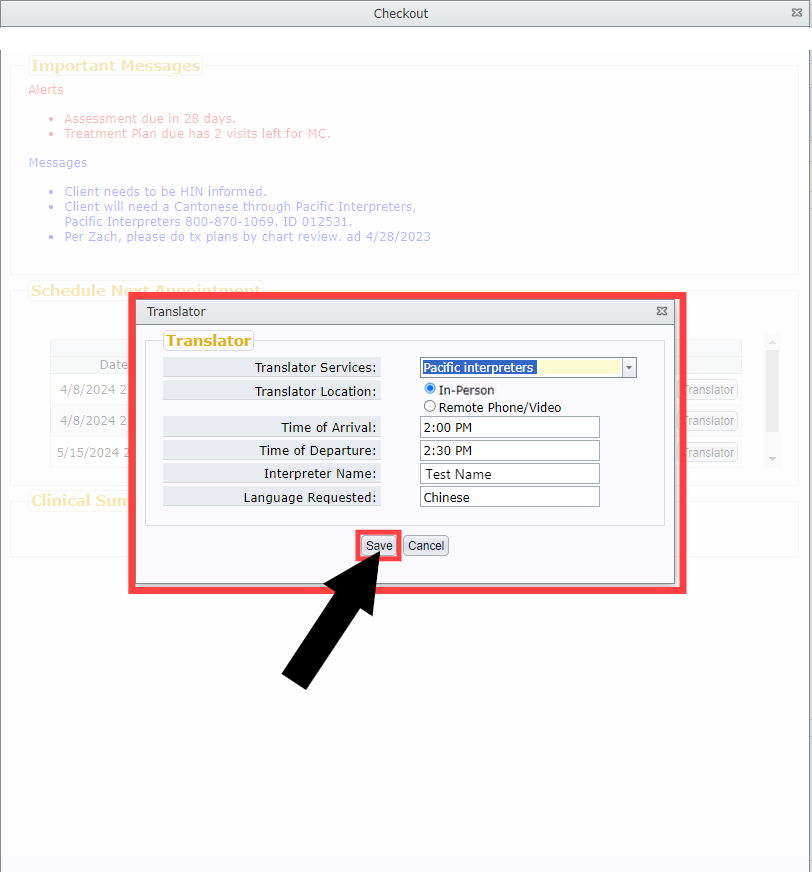
Complete all the fields and then click Save.
| *Please Note: this information can be edited from the schedule at any point, and from the appointment note until it is signed. If you don't know what the interpreter's name is when scheduling, enter anything along the lines of Pending or TBD - basically as a placeholder until you have the information you need. |
Once a translator service has been set up, the Translator button text will appear green.
Here's how it will appear on the schedule.
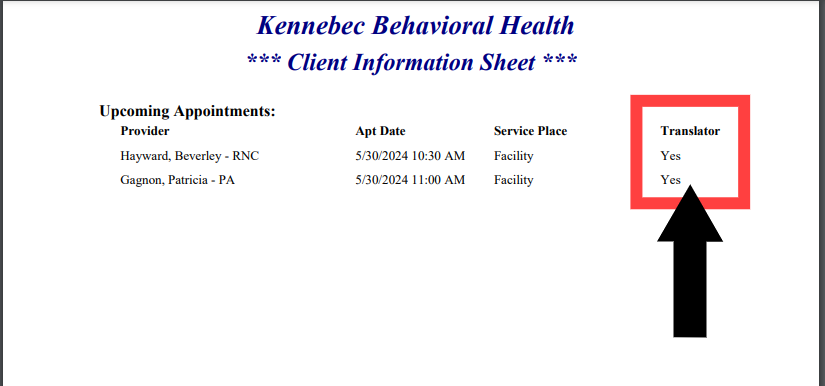
Print Upcoming Appointments or Visit Summary for Client
On both of these reports, there is Translator column that will populate with a Yes or No depending on whether or not the interpreter has been scheduled for the corresponding appointment.